How effectively prevent a decrease in performance?
When your organization has several regional branches located worldwide, you rather need Asynchronous Volume Replication than Synchronous Volume Replication, despite the fact that the second solution provides the shortest downtime and minimize data loss in case of outage. If your servers are located in remote locations - for example one server is in U.S, and a second in Asia, Asynchronous Volume Replication will prevent a decrease in write performance. When file changes are replicated asynchronously - the write performance is not limited by the connection speed between servers, therefore slow connection at one location (e.g. 10Mbit/sec) will not affect the overall write performance.
How to get the benefits of Asynchronous Volume Replication in a different way?
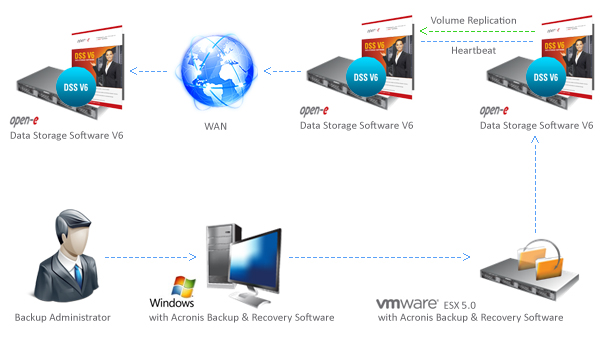
Even though Asynchronous Volume Replication is not featured in our software, you can still benefit from equivalent solution we have prepared. It will provide the same benefits as AVR but in a different way, ensuring uninterrupted and fast asynchronous volume replication of a database to a remote location. The solution below can be used as a replacement for Asynchronous Volume Replication in any customer’s environment. You can read more about this solution on our blog post.
1. Software requirements
a) 2 x Open-E Data Storage Software V6 b5845 with Data (file) replication enabled
b) VMware ESXi 5.0
c) Acronis Backup and Recovery 11
2. Preparing DSS storage with Data (file) replication
Now we will describe how to prepare NAS share on both DSS machines with enabled Data (file) replication. NAS share on the first DSS machine will be used as a centralized backup folder in Acronis Backup and Recovery for a virtual machine backup. The second DSS machine will be used as a co-located backup.
3.1. Configuring the destination node for Data (file) replication - DSS2
Please configure the volume group and create a logical volume for destination data (file) replication (CONFIGURATION -> volume manager -> Vol. groups -> vg00).
 Click to enlarge.
Please configure the IP address on the first eth on the second DSS (SETUP-> network -> Interfaces -> eth0).
 Click to enlarge.
Please configure the IP address on the second eth on the second DSS (SETUP -> network -> Interfaces -> eth1).
 Click to enlarge.
Please enable the data (file) replication agent on the second DSS (CONFIGURATION -> NAS settings).
 Click to enlarge.
Create a new share (esxi5_backup) - used for storing backups over Data (file) replication (CONFIGURATION -> Nas resources -> Shares).
 Click to enlarge.
Please create a new user for sharing - used for a destination in Data (file) replication (CONFIGURATION -> NAS resources -> Users).
 Click to enlarge.
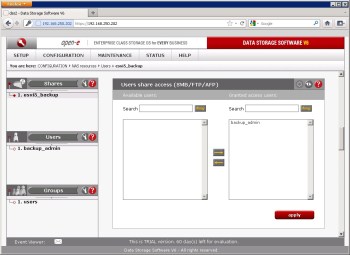
Please grant the user shared access (SMB/FTP/AFP) on the second DSS (CONFIGURATION -> NAS resources -> Users -> esxi5_backup).
 Click to enlarge.
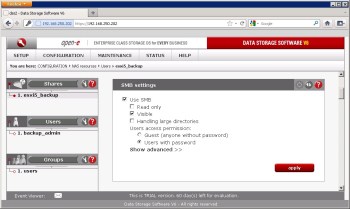
Check the SMB settings for esxi5_backup share (CONFIGURATION -> NAS resources -> Users -> esxi5_backup).
 Click to enlarge.
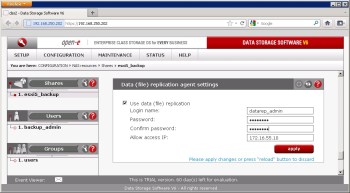
Please enable “Use data (file) replication” on esxi5_backup share on the secondary DSS (CONFIGURATION -> NAS resources -> Shares -> esxi5_backup).
 Click to enlarge.
3.2. Configuring source node for Data (file) replication - DSS
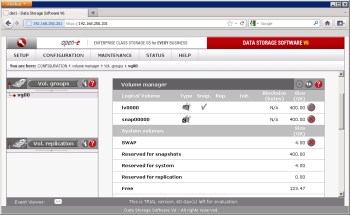
Please configure the volume group and create a logical volume for source data (file) replication and create a snapshot assigned to this logical volume (CONFIGURATION -> volume manager -> Vol. groups -> vg00).
 Click to enlarge.
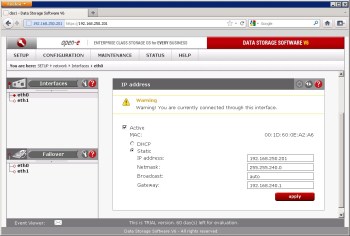
Please configure the first eth IP address on the first DSS (SETUP-> network -> Interfaces -> eth0).
 Click to enlarge.
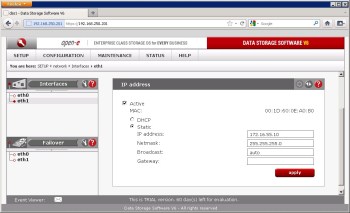
Please configure the second eth IP address on the first DSS (SETUP-> network -> Interfaces -> eth0).
 Click to enlarge.
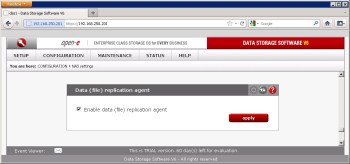
Please enable the data (file) replication agent on the first DSS (CONFIGURATION -> NAS settings).
 Click to enlarge.
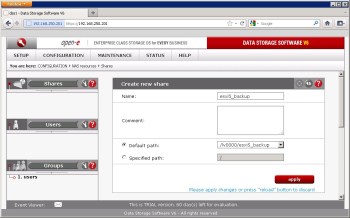
Create a new share (esxi5_backup) - used for storing backups from Acronis Backup and Recovery (CONFIGURATION -> NAS resources -> Shares).
 Click to enlarge.
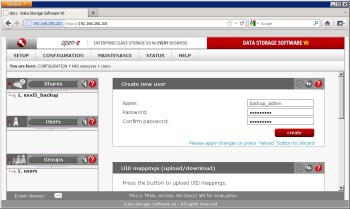
Please create a new user for sharing - used for authenticating Acronis Backup and Restore to share (CONFIGURATION -> NAS resources -> Users).
 Click to enlarge.
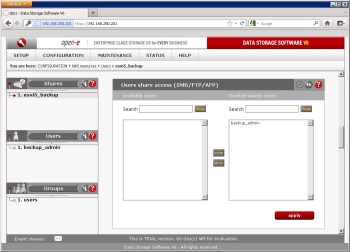
Please grant the user shared access (SMB/FTP/AFP) on the first DSS (CONFIGURATION -> NAS resources -> Users -> esxi5_backup).
 Click to enlarge.
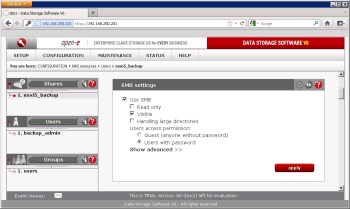
Check the SMB settings for esxi5_backup share (CONFIGURATION -> NAS resources -> Users -> esxi5_backup).
 Click to enlarge.
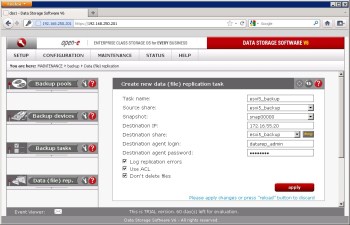
Please create a new data (file) replication task - used on the secondary eth for replication (MAINTENANCE -> backup -> Data (file) replication).
 Click to enlarge.
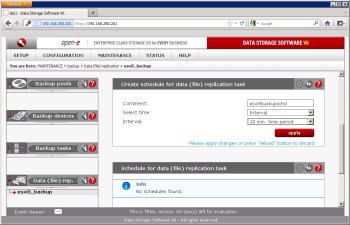
Please create a schedule for data (file) replication task (it depends on the user, in our lab we set it to a 10 min time period).
 Click to enlarge.
4. VMware ESXi 5 configuration overview
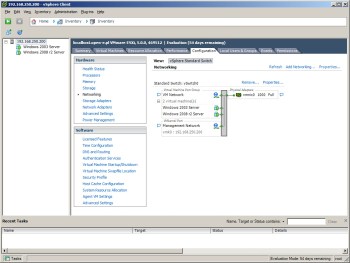
When it comes to VMware ESXi 5 server, there are no special recommendations regarding configuration, it all depends on your preference. You can set up a single ESXi 5 server with local storage for virtual machines as well as a VMware HA cluster environment. You need to be able to access the VMware management network from the Acronis Backup and Recovery software in order to deploy the ESXi 5 agent from Acronis. In our testing environment we had a single ESXi 5 server with a one 1GbE physical network adapter and local storage for virtual machines.
 Click to enlarge.
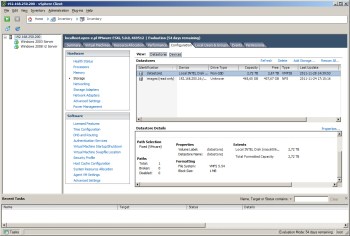
Both virtual machines were powered on and the first one had a thin provisioned virtual disk, the second one was created with a “thick provisioned lazy zeroed” virtual disk.
 Click to enlarge.
5. Preparing the backup software environment.
First you need to make sure that the DSS machines and ESXi server are properly configured. Then you need to install Acronis Backup and Recovery 11 software to proceed to the next steps. If you have all the required software, you can follow these steps to prepare the backup environment.
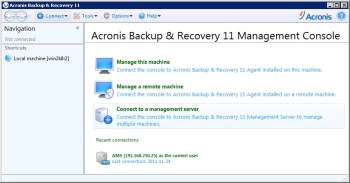
Please run the Acronis Backup and Recovery 11 Console and select “Connect to a management server”.
 Click to enlarge.
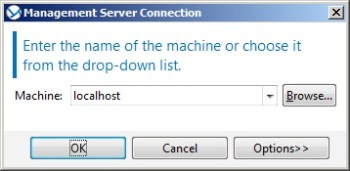
In the “Management Server Connection” section, you need to enter a name or IP address of the machine where the Acronis software is installed. In our case it will be “localhost”. To confirm, click “OK”.
 Click to enlarge.
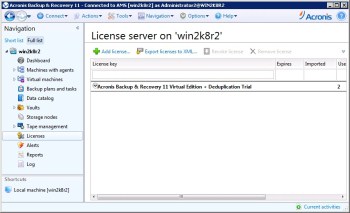
In the next step you need to add your license key by selecting “Licenses” from the Navigation menu on the left, then click “Add license..”
 Click to enlarge.
Now you can add DSS share as a “Centralized vault” to facilitate adding backup tasks. In order to do that, please expand “Vaults” from the Navigation menu and click “Create”.
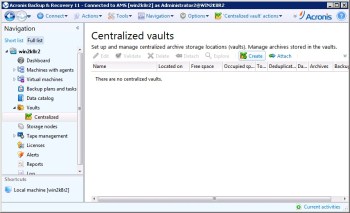 Click to enlarge.
In the next window you need to enter the Vault name, type and select a path to DSS share.
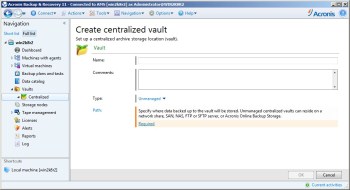 Click to enlarge.
To select a Vault Path, you need to enter the full path to DSS Samba share or browse for it by using “Network folders”. To confirm changes, please click the “OK” button.
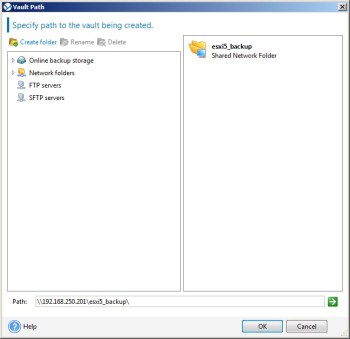 Click to enlarge.
If you have configured a share with user access, you need to specify the “User name” and “Password” to add this share as Centralized Vaults and confirm the changes by clicking “OK”.
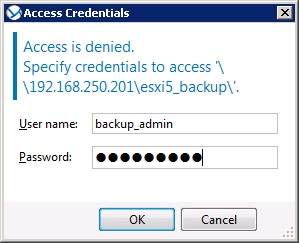 Click to enlarge.
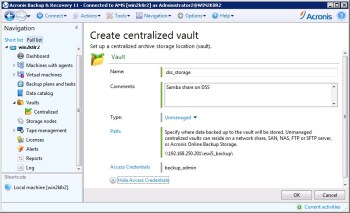
Completed centralized vault configuration should look similar to this picture. To confirm the vault configuration please click “OK”.
 Click to enlarge.
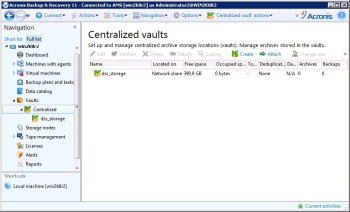
After that you should be able to see vault details in the “Centralized vaults” menu.
 Click to enlarge.
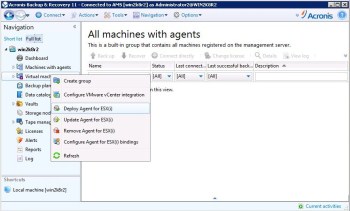
The next step is to deploy an agent for the ESXi server which will be responsible for managing the backup of virtual machines. To do so, please right click on “Virtual machines” from the navigation menu and select “Deploy Agent for ESXi”.
 Click to enlarge.
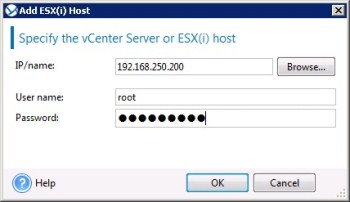
Then you need to specify an IP, user name and password of the ESXi server on which you want to deploy Acronis Virtual Appliance. Confirm the changes by clicking “OK”.
 Click to enlarge.
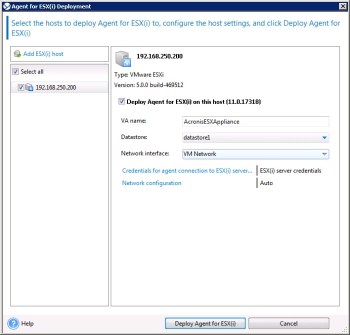
On the next screen you need to select the desired ESXi server from the menu on the left, then enter the VA name, select Datastore and the Network interface which will be used for communication with Acronis. When complete, please confirm the changes by clicking “Deploy Agent for ESX(i)”.
 Click to enlarge.
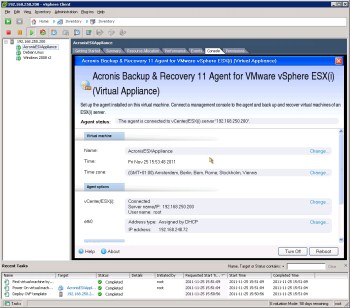
After a while you should see the new virtual machine in your ESXi vSphere Client. Acronis Virtual Appliance should be up and running and you can modify the VA settings in the “Console” window of the Acronis virtual machine.
 Click to enlarge.
6. Creating a backup plan with Acronis Backup and Recovery software
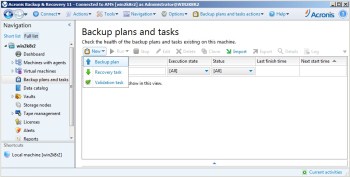
To run scheduled backups from your virtual machines on the ESXi server, you need to create a backup plan in the Acronis Management Console. In this case you need to select “Backup plans and tasks” from the navigation menu, then click the “New” button and select “Backup plan”.
 Click to enlarge.
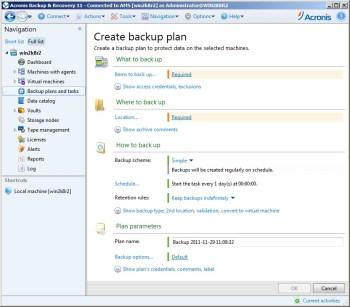
On the “Create backup plan” screen, you need to setup the following backup plan options:
“Items to back up...” - select virtual machines for which you want to create a backup.
“Location...” - select the DSS share where backups will be stored.
“Backup scheme:” - in this example we will use “Simple” backup scheme.
“Schedule...”
“Retention rules:” - in this example we will keep backups indefinitely.
“Backup type” - we will use an “Incremental” backup type. In this case only the first virtual machine backup will have the full size of a virtual machine. The next incremental backups will have only the delta changes that occur on virtual machines.
“When to validate:” - if you like, you can check backup consistency on a schedule or by selecting a rule.
“Plan name:”
First, please select the virtual machines you want to backup by clicking the “Items to backup...” option.
 Click to enlarge.
Then select virtual machines for which you want to create a backup plan and click “OK” to confirm.
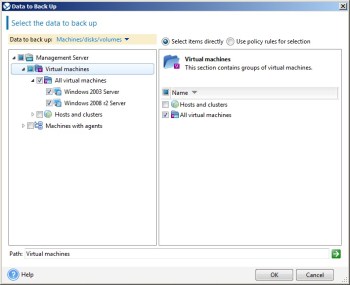 Click to enlarge.
In the next step, select a backup location by clicking the “Location...” option, then select a Centralized vault folder from the DSS that you added in the earlier chapter.
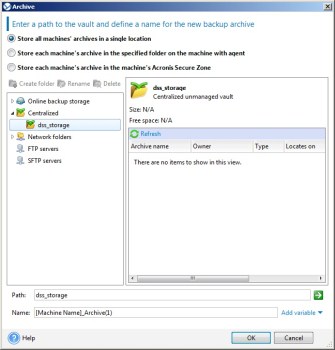 Click to enlarge.
In the next step, configure the other backup options as you want. You can select the “Incremental” type of backups to achieve better results.
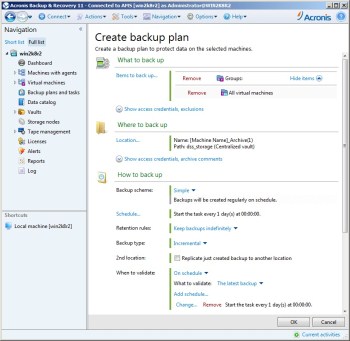 Click to enlarge.
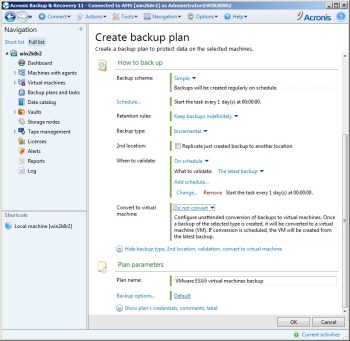 Click to enlarge.
Also, you need to specify a schedule time on which backups will be created. This can be done by clicking the “Schedule...” option on the “Create backup plan” screen and choose the expected value.
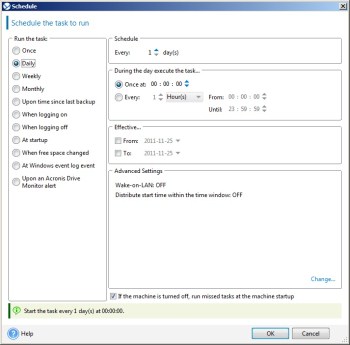 Click to enlarge.
When you complete the backup plan configuration, you can confirm the changes by clicking “OK”. You can also check your currently added backup plans by selecting “Backup plans and tasks” from navigation menu.
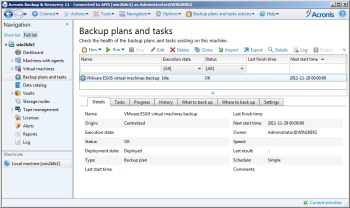 Click to enlarge.
If you want to run your backup task now, you can do it by expanding the “Run” menu and selecting “Incremental backup” in the “Backup plans and tasks” screen.
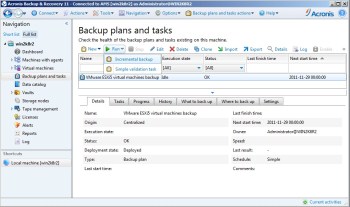 Click to enlarge.
After a few seconds, you should see the backup progress in the “Backup plans and tasks” window.
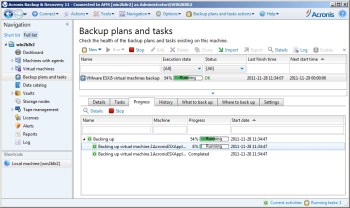 Click to enlarge.
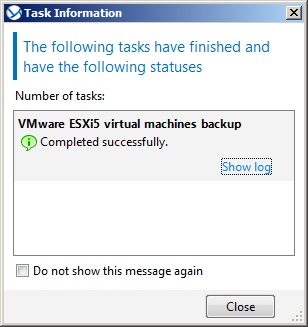
If the backup job was successful, you should see a following “Task Information” message window.
 Click to enlarge.
7. Disaster recovery of virtual machines after hardware failure
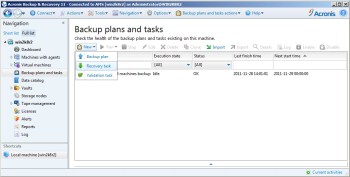
If one of your ESXi servers crashed because of hardware failure, you can recover your virtual machines by creating a “Recovery task” in the Acronis Management Console. To perform this, you need to select “Backup plans and tasks” from the Acronis navigation menu, expand the “New” menu and select the “Recovery task” option.
 Click to enlarge.
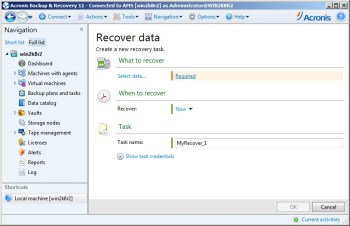
On the next screen you need to select the data which need to be recovered, specify time when recovery task should be run and enter a task name. Please click the “Select data...” option to select a backup share with virtual machines images.
 Click to enlarge.
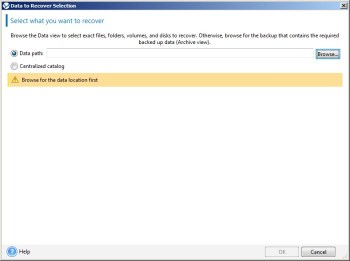
On the next screen, you can select the “Centralized catalog” which you added earlier or enter “Data path:”. In our example we will use the backup share from the second DSS server (co-location server), but you can also choose to share from the first DSS. Please click on the “Browse” button to proceed.
 Click to enlarge.
Now you need enter the full path to DSS share with virtual machines backup, or select the “Centralized vault” with backups. To confirm the changes, click “OK”.
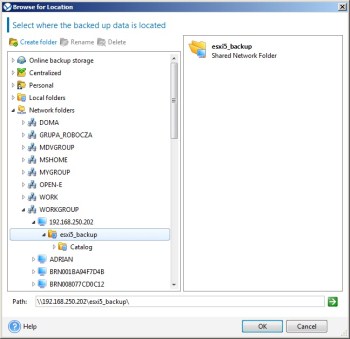 Click to enlarge.
If you have configured user access for selected share, you need to specify access credentials.
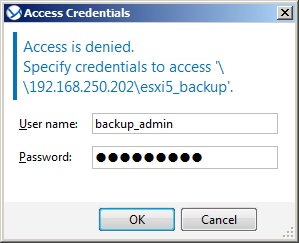 Click to enlarge.
If everything went ok, you should be able to select your backup from the list and confirm your selection by clicking “OK”.
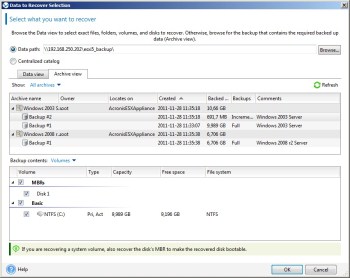 Click to enlarge.
In the next step, you need select where you want to recover your backed up virtual machine. You can create a new virtual machine from a backup or restore a backup to existing virtual machines. After applying all required changes, confirm your selection by clicking “OK”.
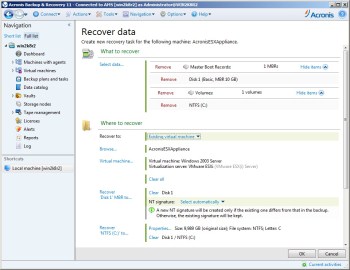 Click to enlarge.
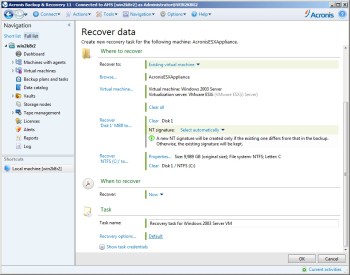 Click to enlarge.
You can check the recovery task details by opening a task in “Backup plans and tasks” in the navigation menu.
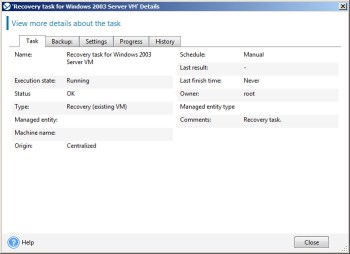 Click to enlarge.
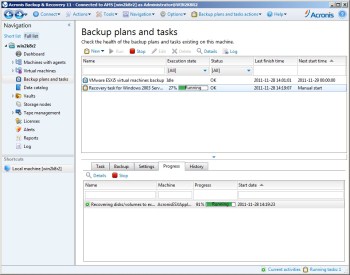 Click to enlarge.
And that is it! Now everything should be well-configured and work properly. Find out more about our Open-E DSS V6 and learn how it can help you to reach your goals.
Trademarks: The names of actual companies and products mentioned herein may be the trademarks of their respective owners.
