This page relates to our legacy software, which is no longer supported. Explore the advantages of Open-E JovianDSS.
NOTE:
You must be using DSS V6 up14 or newer.
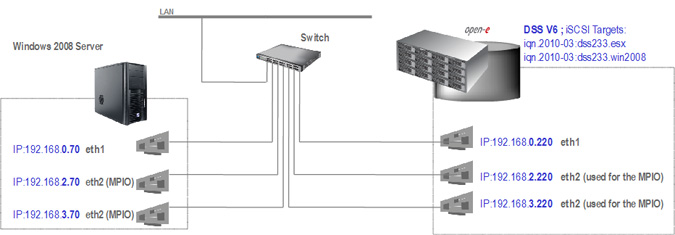
top ↑1. Hardware configuration
Example configuration of Multipath I/O on Open-E Data Storage Software V6 and Windows 2008
Hardware Requirements:
To run the Multipath I/O on DSS V6 with Windows 2008 server, a minimum of two network cards in both systems are required. In this example the DSS V6 system and Windows 2008 server use three NICs.
Pic 1
Pic 2
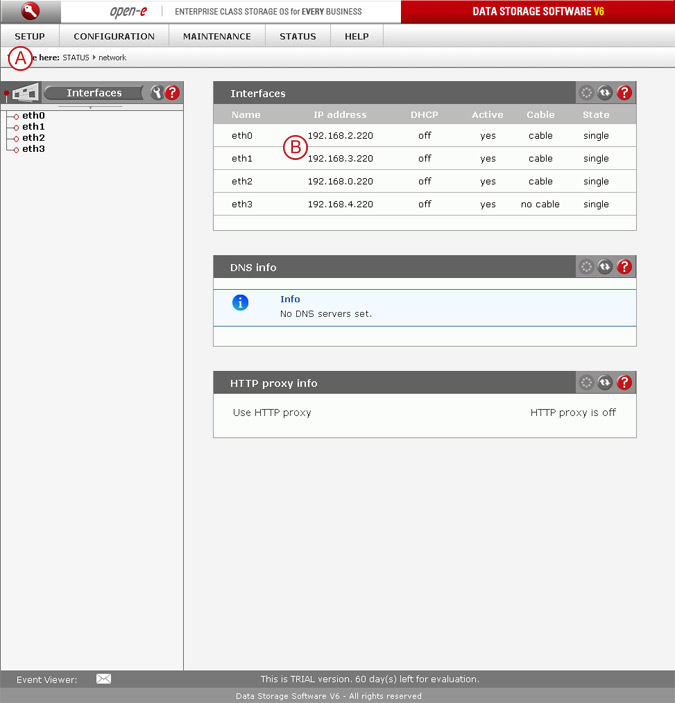
 - In order to verify proper NICs settings, go to menu: "STATUS" tab, "network" and Interfaces.
 - Two NICs must be used for MPIO, we will use the following IP addresses: 192.168.2.220, 192.168.3.220

Pic 3
- Next, go to menu: "CONFIGURATION tab, "volume manager" and Vol. groups.
In Volume manager,  create two Block-IO or File-IO iSCSI volumes.
Pic 4
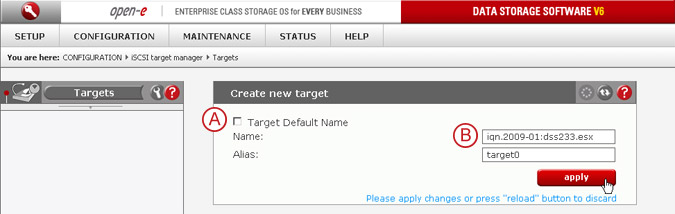
- In menu: "CONFIGURATION" tab, "iSCSI target manager", Targets, please uncheck the Target Default Name and enter target name: iqn.2009-01:dss233.esx

Pic 5
- Then the second one: iqn.2009-01:dss233.win2008
Pic 6
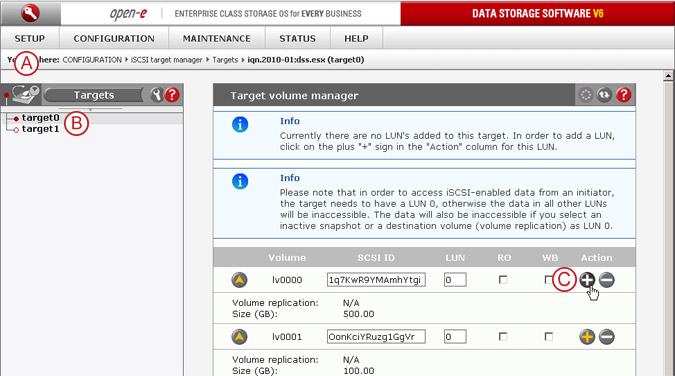
- In menu "CONFIGURATION" tab, "iSCSI target manager", Targets, select first alias: target0 and click on the  button.
Pic 7
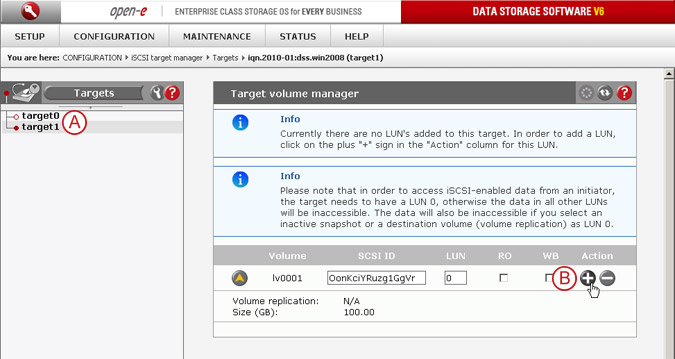
- Then select the second alias: target1 and click on the button.
Step 1
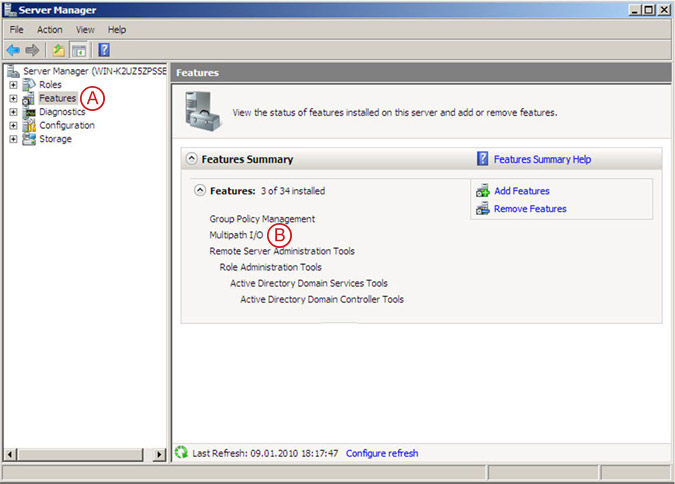
Pic 8
Navigate in the Windows 2008 server to the Server Manager, then access the "Features" section and add the "Multipath I/O" feature.
Step 2
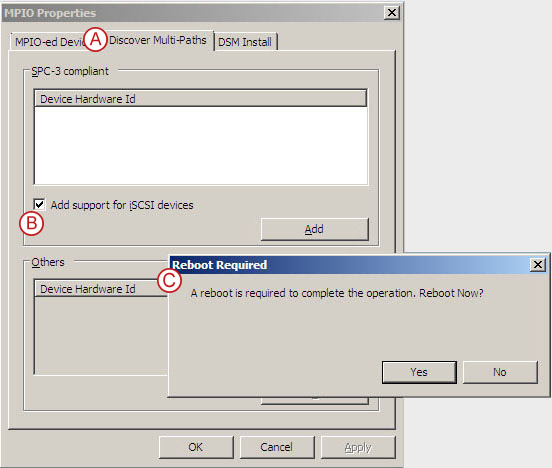
Pic 9
Run MPIO from the Administrative Tools. In the MPIO Properties, go to the "Discover Multi-Paths" tab, check the "Add support for iSCSI devices" box, and click on the "Add" button. The system will reboot as this is required. If the checkbox "Add support for iSCSI devices" cannot be selected, you will have to logon to any iSCSI target using an iSCSI initiator first.
Step 3

Pic 10
Launch the Microsoft iSCSI Initiator and click on the "Discovery" tab then click "Add Portal...", and enter the IP addresses of the two network interfaces of the DSS V6 server which has one or more iSCSI targets enabled.
Step 4
Pic 11
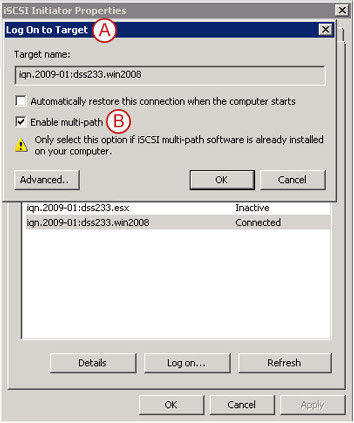
Click "Log on..." on the "Targets" tab, and check the "Enable multi-path" box.
Step 5
Pic 12
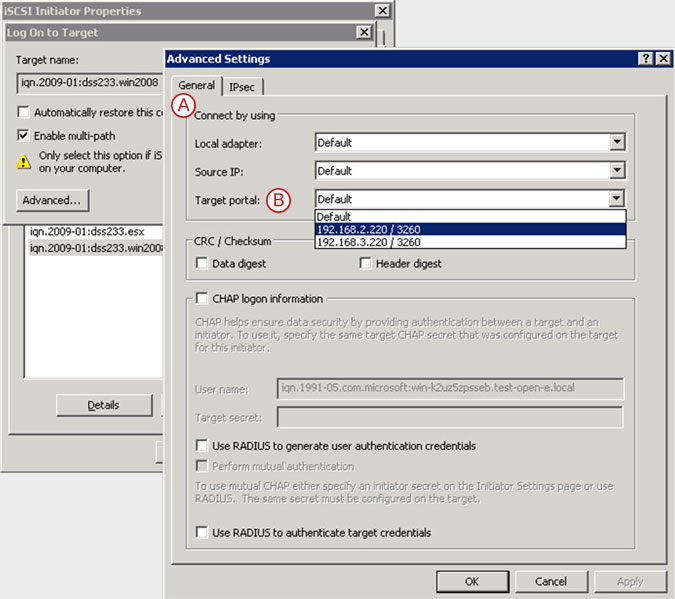
Click the "Advanced..." button below on the "General" tab, select the IP address for the first path from the list of the "Target portal" field.
Please note that the values of the "Local adapter" and "Source IP" fields must remain to "Default".
Step 6
Pic 13
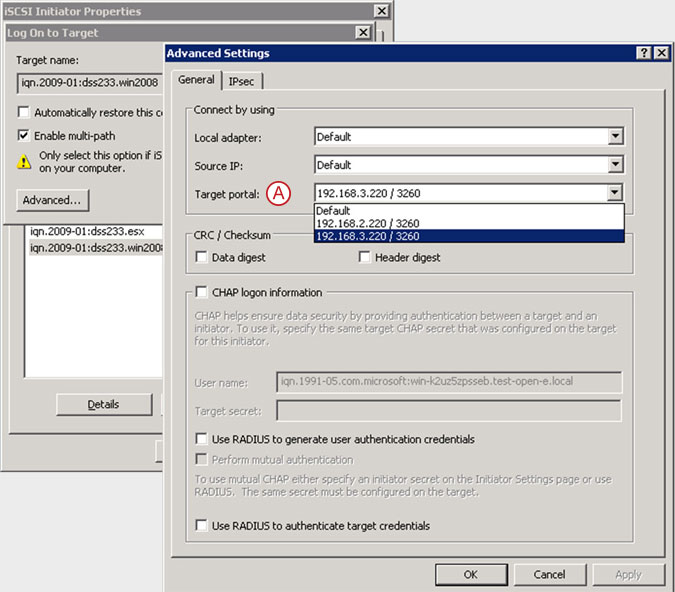
It is needed to log on as many times as there are paths to be used in MPIO (in this example we will log on twice), repeat steps 4. and 5., this time selecting the IP address for the second path in "Target portal". Again, make sure the values of the "Local adapter" and "Source IP" fields remain at "Default".
Step 7
Pic 14
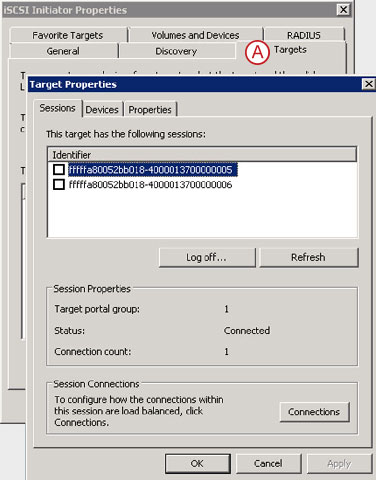
Now go back in the iSCSI Initiator's main window and go to the "Targets" tab, select the target, and click the "Details" button.
Step 8
Pic 15
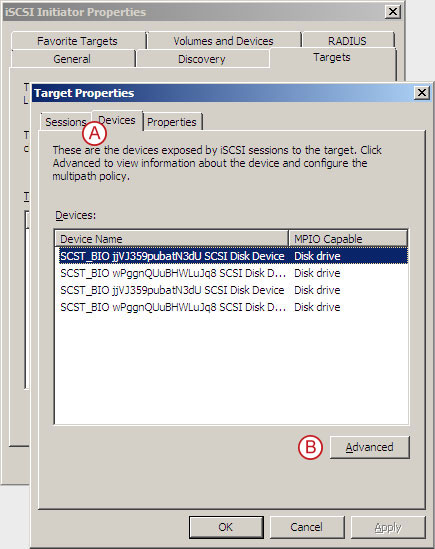
On the "Devices" tab, click the "Advanced" button.
Step 9
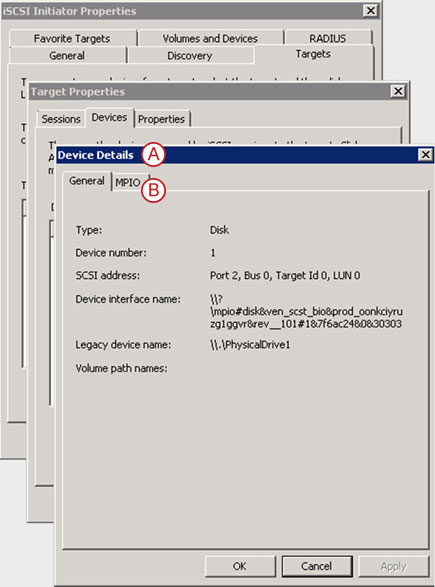
Pic 16
In the "Device Details" window, go to the "MPIO" tab.
Step 10
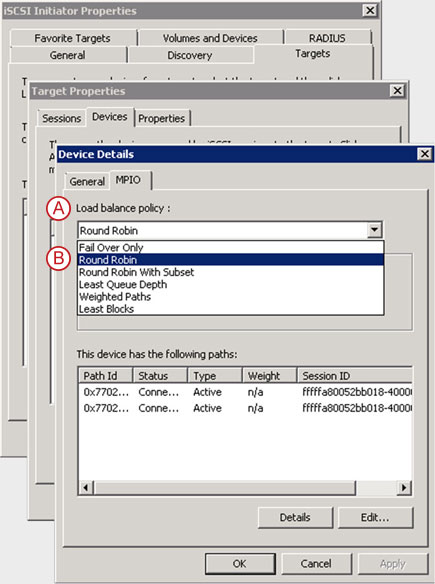
Pic 17
Select "Round Robin" in the "Load balance policy" from the pull down menu, confirm by clicking the "OK" button and exit the iSCSI Initiator.
Step 11
Pic 18
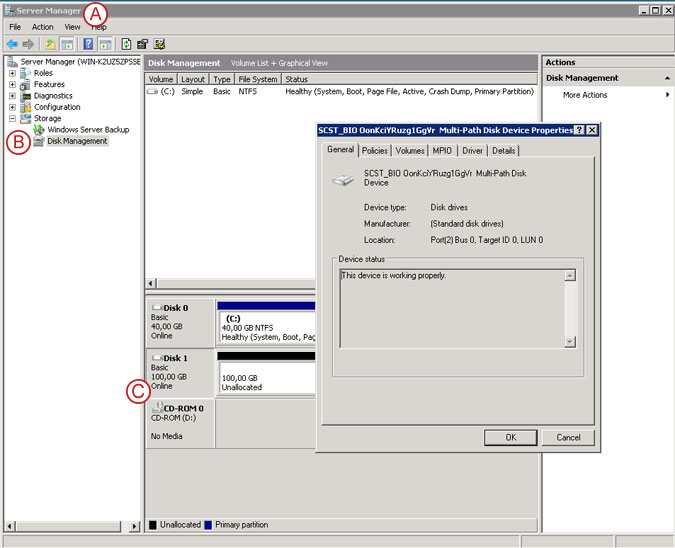
Now go back to the "Server Manager" and navigate to the "Storage -> Disk Management".
Next, right-click on the disk provided by the iSCSI Initiator and select "Properties".
Step 12
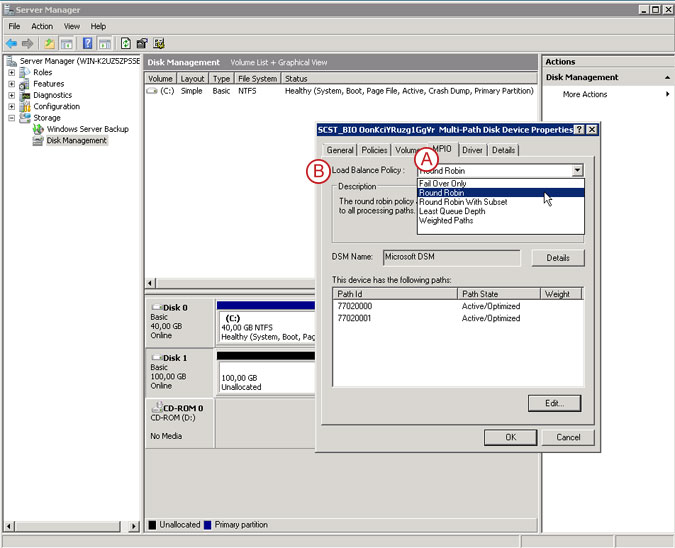
Pic 19
On the "MPIO" tab, select "Round Robin" from the "Load Balance Policy" pull down menu and click the "OK" button to confirm.
Step 13
Pic 20
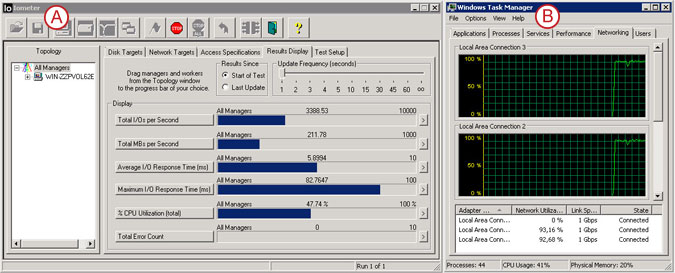
Verify the performance with "Iometer" and "Windows Task Manager".