This page relates to our legacy software, which is no longer supported. Explore the advantages of Open-E JovianDSS.

Failover Cluster allows multiple computers (called nodes) work together in order to provide high availability of some services (e.g. file service, web service). In case of a situation when a node responsible for a service fails, the second one is able to take over this service and prevents from an unexpected downtime. Thanks to this approach access to service after node failure is still available.
In this document we are visualizing process of setting up a failover procedure for Windows 2008 File Service in two node cluster configuration (Active/Passive) in combination with common for these both nodes SAN storage (iSCSI Target) managed by Open-E Data Storage Software V6.
To configure such a functionality on both hardware and software levels please follow the instructions below.
- Hardware configuration
- Configure Domain Controller (DC)
- Configure Network Interfaces on the DSS V6
- Creating Volume Groups
- Creating iSCSI volumes
- Creating iSCSI targets
- Setting both nodes Windows Enterprise Edition
- iSCSI Initiator configuration
- Disk Management
- Failover Clustering configuration
- Clustering configuration
NOTE:
You must be using DSS V6 up10 build 3719 or newer.
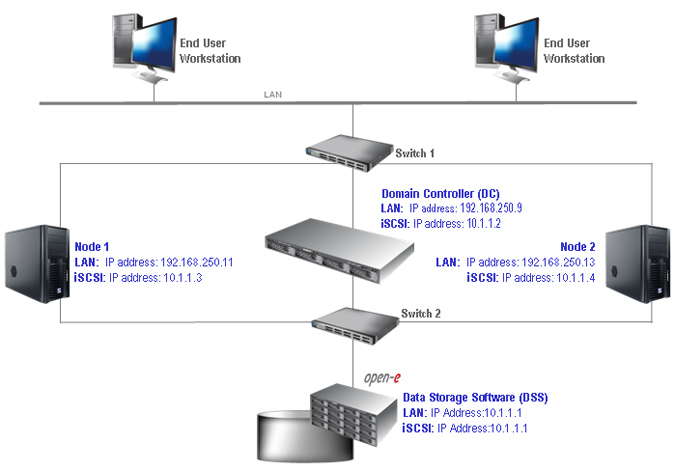
top ↑1. Hardware configuration
Pic 1

| LAN | |
|---|---|
| IP: | 192.168.250.9 |
| Netmask: | 255.255.240.0 |
| Default gateway: | 192.168.240.1 |
| DNS: | 127.0.0.1 |
| iSCSI | |
|---|---|
| IP: | 10.1.1.2 |
| Netmask: | 255.0.0.0 |
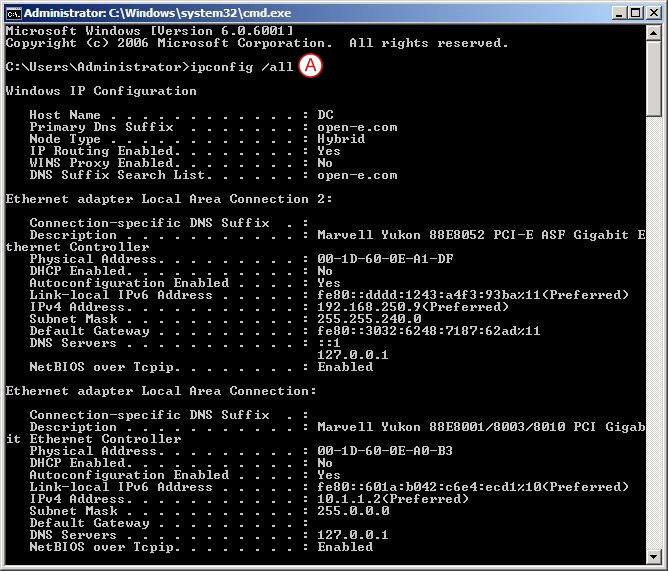
Pic 2
 - After configuring the DC server, check the settings with "ipconfig /all" from the DOS command prompt in windows.
NOTE:
Add the role of Active Directory Domain Services (AD DS) and run the Active Directory wizard to set up the domain. You can use this article for further details: Installing a New Windows Server 2008 Forest by Using the Windows interface.
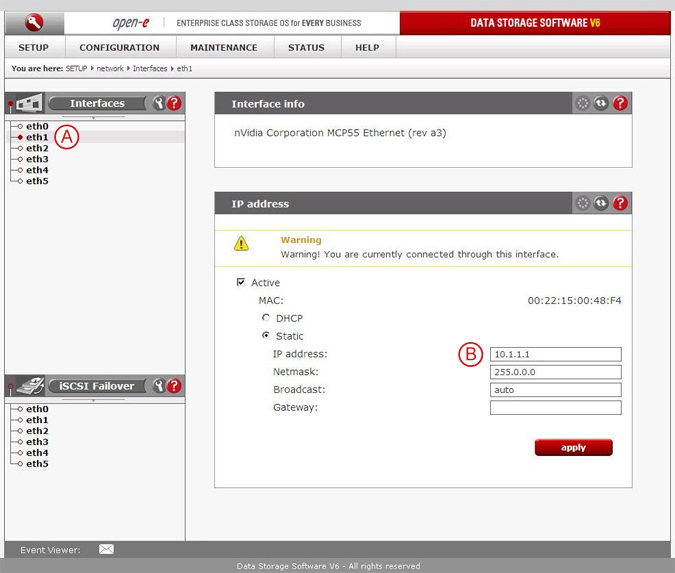
Pic 3
- After logging on the DSS V6 please go to "SETUP" tab, "network" and Interfaces. Next select active interface, in this example please select eth1.
 - After selecting, change the IP Address from 192.168.1.220 in field IP address to 10.1.1.1, and click the apply button. (This will restart network configuration).
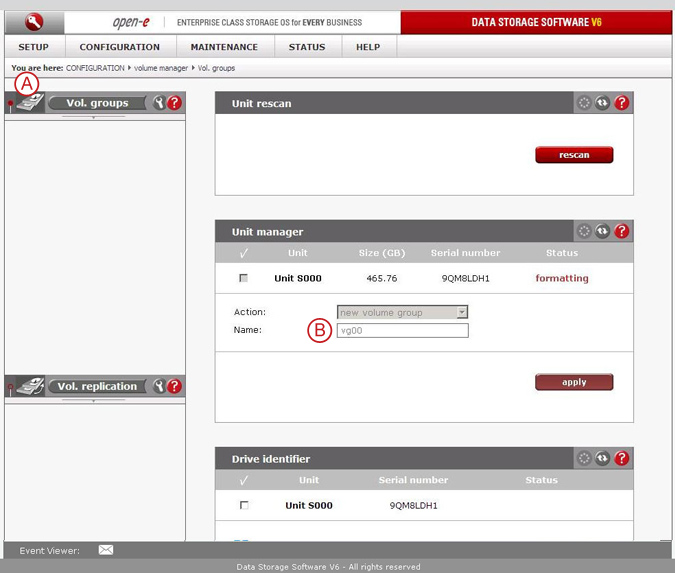
Pic 4
- Under the "CONFIGURATION" tab, select "volume manager" and next Vol. Groups.

Volume Groups (vg00)
- In Unit manager add the selected physical units (Unit S000 or other) to create a new volume group (in this case, vg00) and click apply button.
top ↑5. Creating iSCSI volumes

Data Storage Software (DSS), IP Address:10.1.1.1
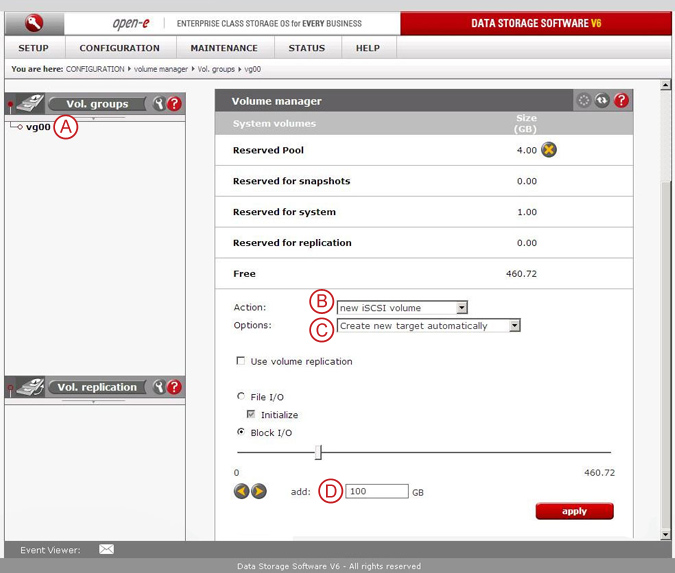
Pic 5
- Select the appropriate volume group (vg00) from the list on the left and create a - new iSCSI volume of the required size. This logical volume will be the destination of the replication process. Next select in  - Options field Create new target automatically.
 - After assigning an appropriate amount of space for the iSCSI volume, click the apply button.
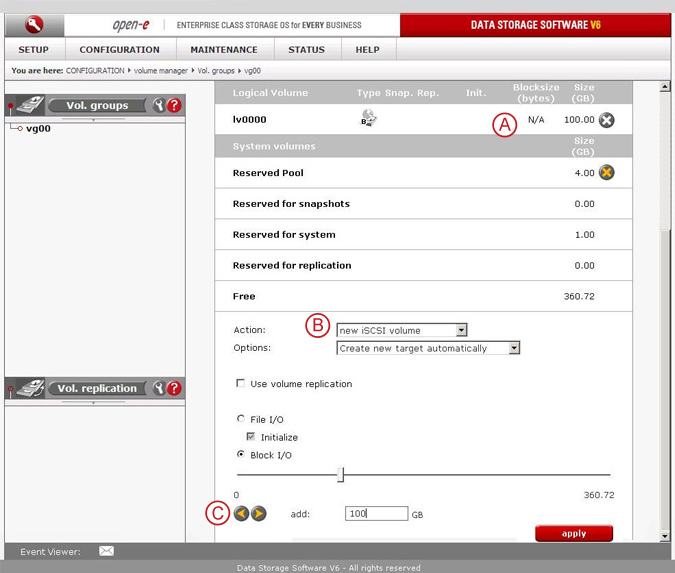
Pic 6
- The iSCSI Volume Block I/O is now configured.

iSCSI volume (lv0000)
Next, in - Action fileld select again new iSCSI volume to create the 2nd iSCSI volume. - After assigning an appropriate amount of space for the iSCSI volume, click the apply button.
iSCSI volume (lv0001)
top ↑6. Creating iSCSI targets
Data Storage Software (DSS), IP Address:10.1.1.1
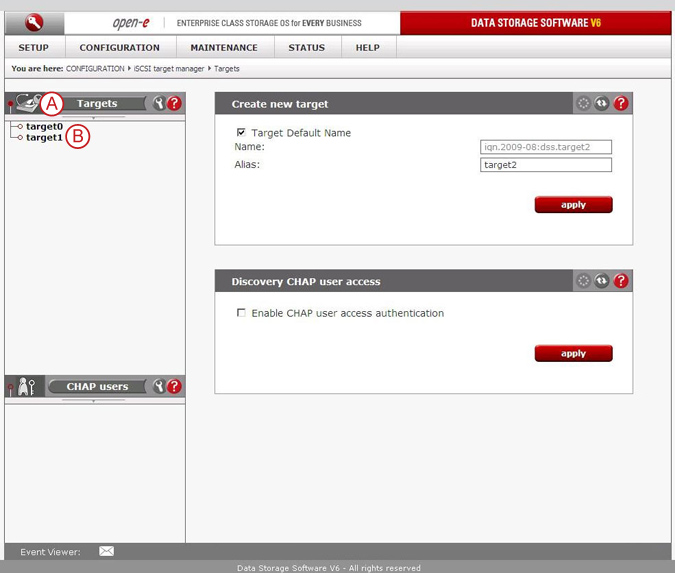
Pic 7
Under the "CONFIGURATION" tab, select "iSCSI target manager" and next - Targets. - Both targets should be presented as (target0 and target1).

iSCSI targets (target0)
iSCSI targets (target1)
Set up two Windows 2008 Enterprise Server Edition systems. These will be the cluster nodes. Configure basic settings such as computer name, TCP / IP configuration for both network cards, membership in the domain. As in the case of the domain controller, we will also use and configure two network connections, one to communicate with the "public" LAN and the second reserved for iSCSI traffic.
| LAN (Name: NODE1) | LAN (Name: NODE2) | ||
|---|---|---|---|
| IP: | 192.168.250.11 | IP: | 192.168.250.13 |
| Netmask: | 255.255.240.0 | Netmask: | 2255.255.240.1 |
| Default gateway: | 192.168.240.1 | Default gateway: | 192.168.240.1 |
| DNS: | 192.168.250.9 | DNS: | 192.168.250.9 |
| iSCSI (Name: NODE1) | iSCSI (Name: NODE2) | ||
|---|---|---|---|
| IP: | 10.1.1.3 | IP: | 10.1.1.4 |
| Netmask: | 255.0.0.0 | Netmask: | 255.0.0.0 |
Add both servers to the previously created domain. All cluster nodes should be in the same OU (Organisational Unit).
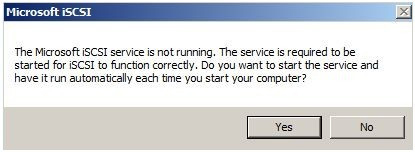
Pic 8
After running the Windows Server 2008 Initiator application, you will be informed that the Microsoft iSCSI service is not running and that it is essential for the proper operation of the iSCSI. By clicking on Yes, you agree to include such services in the auto start area.
Pic 9
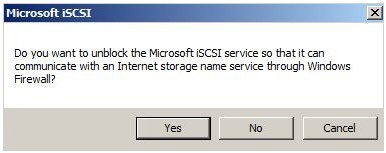
You will be immediately presented another message asking if you want to unlock the iSCSI service and allow it to communicate via the iSNS (Internet Storage Name Service) protocol. This protocol allows you to automatically search for, manage and configure iSCSI targets
Pic 10
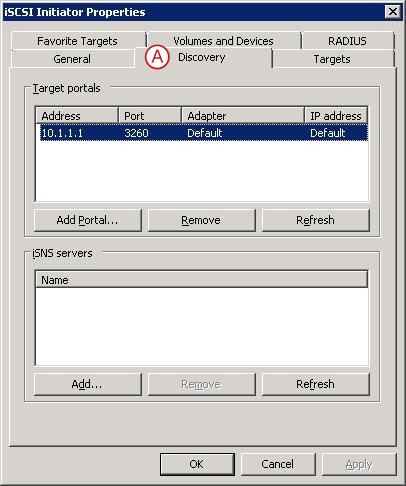
- In the iSCSI Initiator you have to visit at least two tabs "Discovery" and "Targets". On the Discovery tab you need to enter the IP address of the iSCSI target. This will be the IP address of DSS V6 server, which in this example is 10.1.1.1. Click "Add Portal" and enter 10.1.1.1
Pic 11
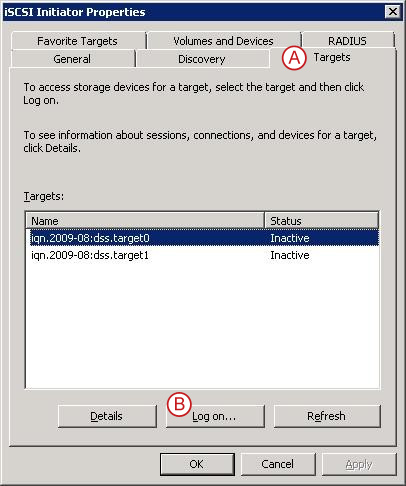
Then go to the - "Targets" tab. You should see two targets, which have been created earlier on the DSS V6. If this is not the case, try to refresh the view using the Refresh button. - Log on to each of them by clicking on the Log on... button.
Pic 12
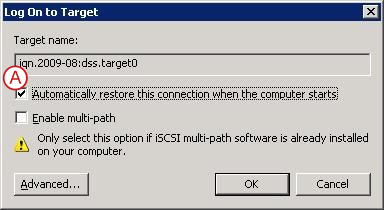
As a result, a Log On to Target window appears .- Select the option to "Automatically restore this connection when the computer starts" and click the OK button.
NOTE:
Target status should change from Inactive to Connected. These activities should be conducted on all servers you plan to use as nodes in the cluster, in this example NODE1 and NODE2
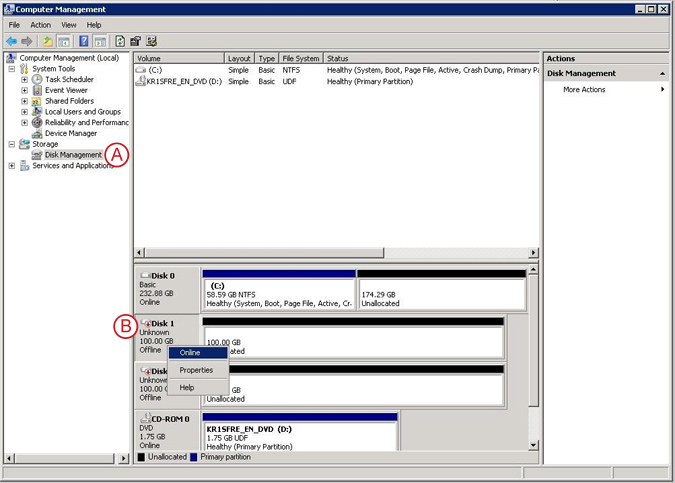
Pic 13
- In the Disk Management window there should appear both targets added earlier. - Click the right button on the first one and select the "Online" menu.
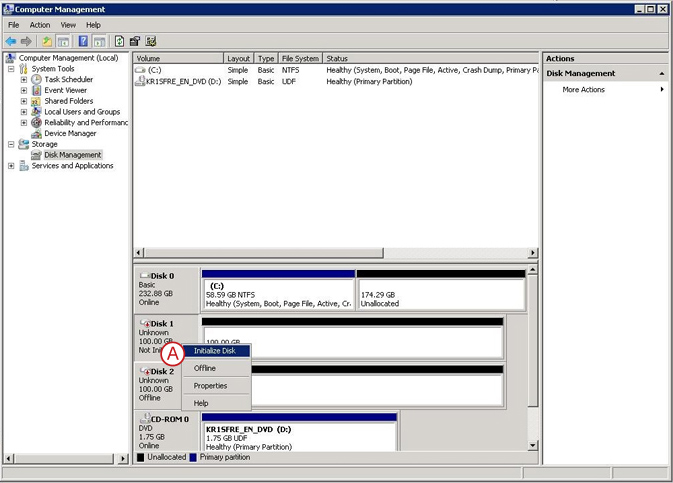
Pic 14
- Then re-open the menu, click on "Initialize Disk"
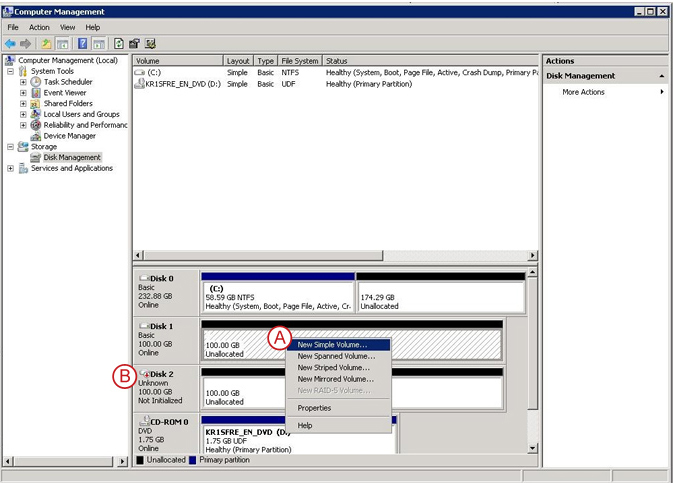
Pic 15
- Finally you will need to create an "NTFS volume" on the target using the wizard and keeping the default settings.
- Perform the same steps on the second target. On the second server (NODE2) go to "Disk Management", click the right button on the target and select "Online" (Pic 14).
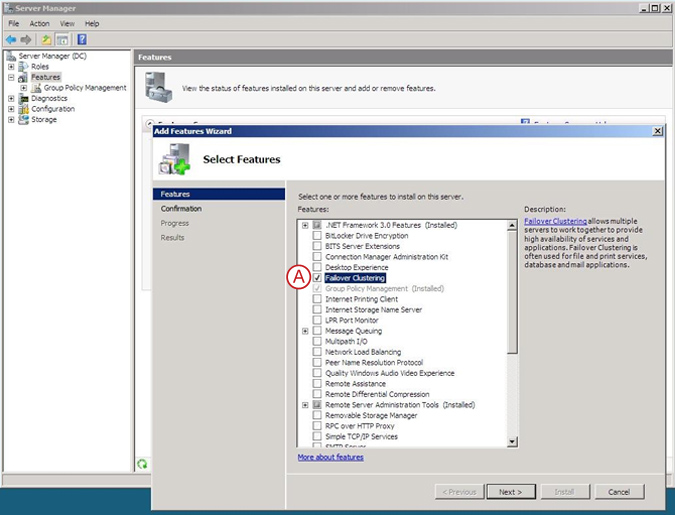
Pic 16
- To manage the clusters in Windows 2008 Server use the management console. You can gain access to it after adding the appropriate functionality. For this purpose, in the Server Manager on both nodes as well as the domain controller right-click on the Features menu and choose "Add Features". In the available list, select "Failover Clustering", then Next and Install.

Pic 17
- On the domain controller run the snap manage clusters: Start - Administrative Tools - "Failover Cluster Management". From this level you can manage clustering.
One of the first steps that you should take here is to validate the components on which you have installed your cluster. For this purpose, a special wizard has been created, which can be run by clicking on the "Validate a Configuration" link in the middle of the console.
Pic 18
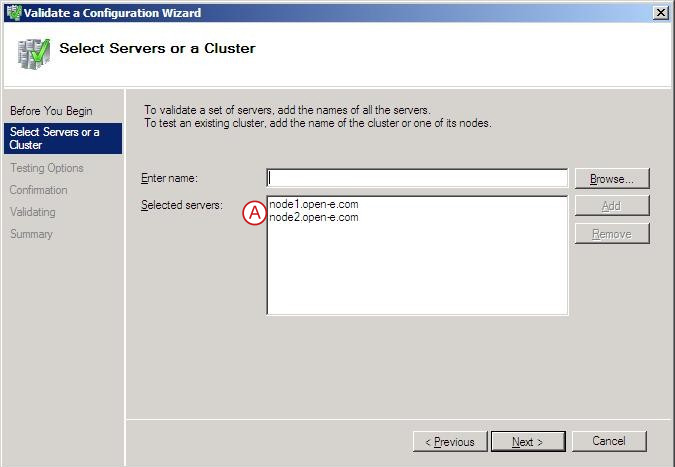
- In the wizard, add the two servers: NODE1, and NODE2.
Pic 19
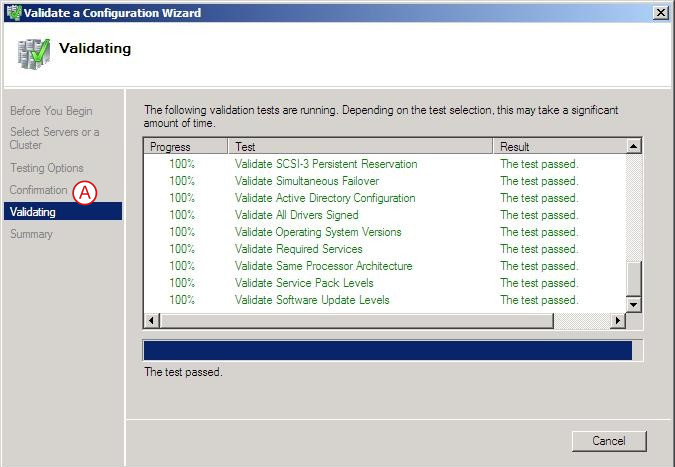
- Next perform all the tests, in the Testing Options window select the "Run all tests" (recommended) option. In the next window (Confirmation), you can view your pre-selected options and run the tests by clicking on Next.
Pic 20
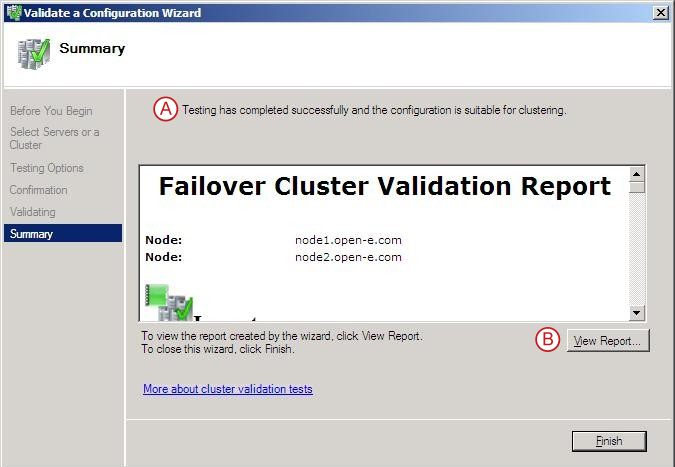
If you have done the previous steps correctly, then after a few minutes testing should be completed successfully, and you should receive the following summary: - "Testing has completed successfully and the configuration is suitable for clustering".
- By clicking on the View Report you can view the Failover Cluster Validation Report, which contains a sizeable list of all the tests carried out along with information about what was tested specifically
NOTE:
If one of the tests fails, it does not necessarily mean that the cluster will not work. However, you need to be aware that in case of any later problems with the cluster this configuration will not qualify for technical support

Pic 21
On the domain controller, run the Failover Cluster Management console and click on Create Cluster. In the Select Servers window, add the servers to perform the role of nodes (NODE1 and NODE2).
- In Access Point for Administering the Cluster, - select the name and IP address of the cluster . This is basically all the information you need to put in. Clicking on Next in order confirmation then will begin the process of creating a cluster. After the wizard is finished you can view a report which describes the various activities constituting the cluster installation process.
Pic 22
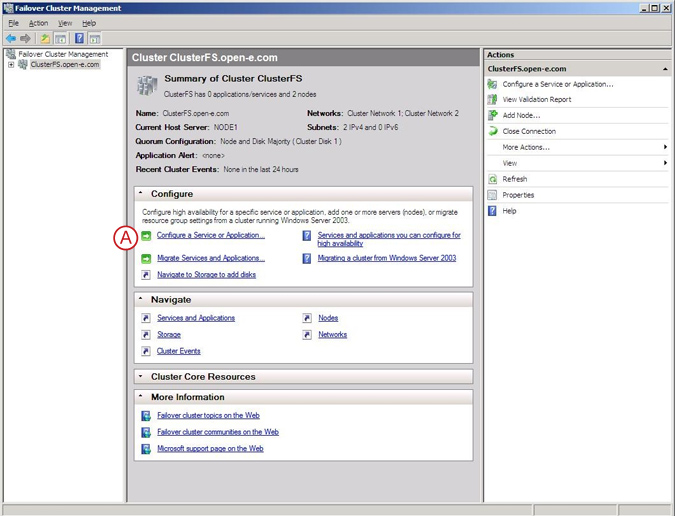
After creating the cluster you need to configure the cluster services, e.g. a file serving capability. In the "Failover Cluster Management" console, right-click on the "Services and Applications" menu and select - "Configure a Service or Application ..."
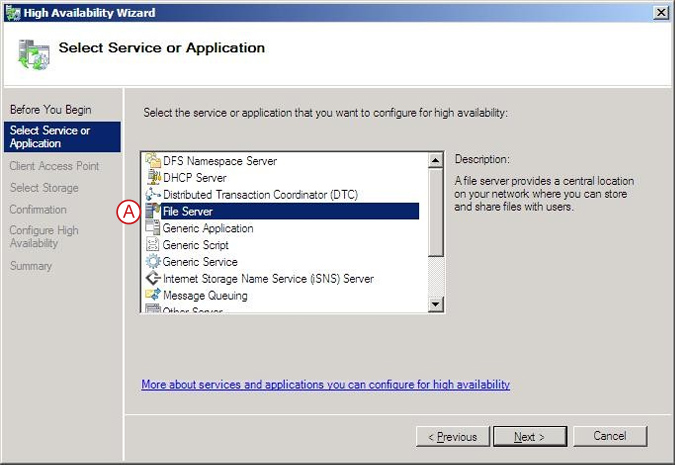
Pic 23
In the wizard, mark the High Availability Wizard, next - File Server and click Next.
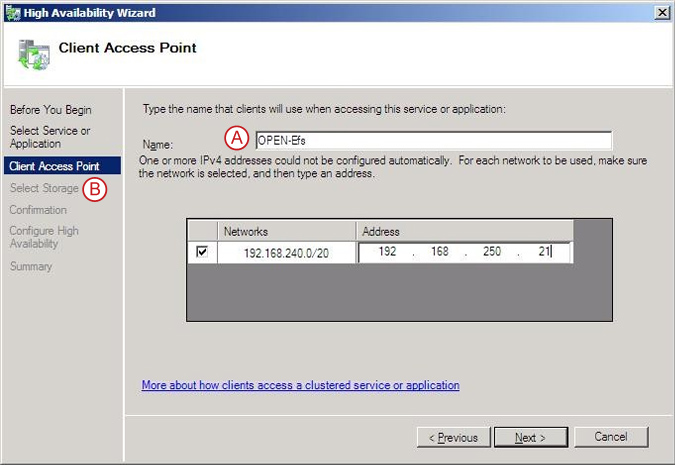
Pic 24
- Next Define the name of the file server and its IP address and click Next.
- In Select Storage mark the only available drive and click Next, then allow the wizard to configure a highly available file server. Now, you only need to provide resources to users.
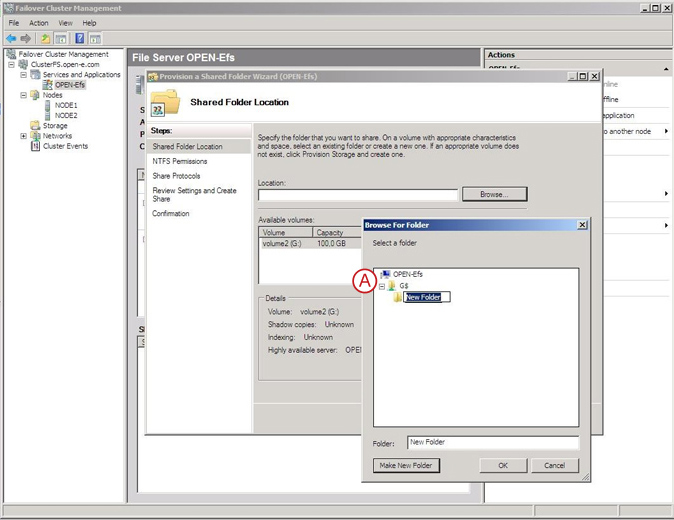
Pic 25
- For this purpose, start the Failover Cluster Management console on the domain controller and right-click on the cluster name. Afterwards select Add a shared folder and click Browse to create a new directory
The next wizard window is mainly concerned with NTFS and access rights. Adjust them according to your own needs. You can access the shared cluster resources by typing \\[cluster_name]\
Pic 26
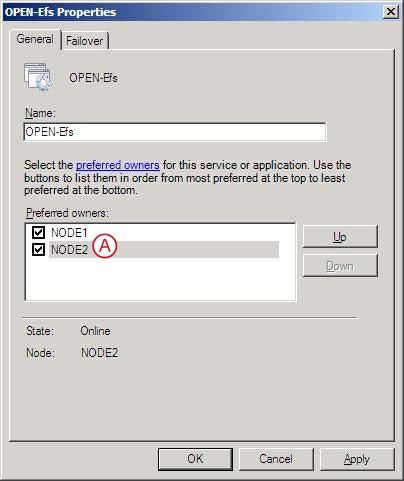
If you need auto failback you have to start the Failover Cluster Management console on the domain controller and select Properties after right-clicking on the cluster name. - Next, select preferred nodes and click Allow failback on the Failover tab.
NOTE:
To test the configuration, you can start copying a file to the cluster resources and then turn off NODE2. After a few seconds, control should be delegated to NODE1 and the copying should resume.